
ACRYLIC HALLOWEEN BOOKMARK

Fall is my absolute favorite time of the year. I love the change to the colder weather, the colors of the leaves, all the fall flavors and the holidays that come with it. Halloween wasn’t something I got super in to until last year. I had left my job in football and finally had the time to enjoy the best part of the year. I went all out. I made all kinds of decor for our front yard, the outside & inside of our house, watched ALL the scary movies and just embraced all things spooky.
If you follow me on Instagram, you’ve been along for the ride with me over the last month as I’ve been working on a HUGE Halloween quilt. I have a highlight saved on my page if you want to catch up but I just finished the back and front pieces. I still have to add batting, pin it, do the quilting and add the binding - hopefully I’ll be done by Halloween lol. In the meantime, I have a few smaller easy DIYs that I can’t wait to share with you.
Over the summer, I got really in to reading. I discovered that with my local library card I could borrow digital books on my iPad and started devouring books quickly! The only problem was that there is a long wait list for a lot of the newer books through the app so I went to my local library to grab a few physical copies of books. My first time there, I came across a beautiful reading garden behind the building and started spending time there every day the weather allowed. I usually had the place to myself and enjoy sipping on a coffee and plowing through my “To Be Read” pile.
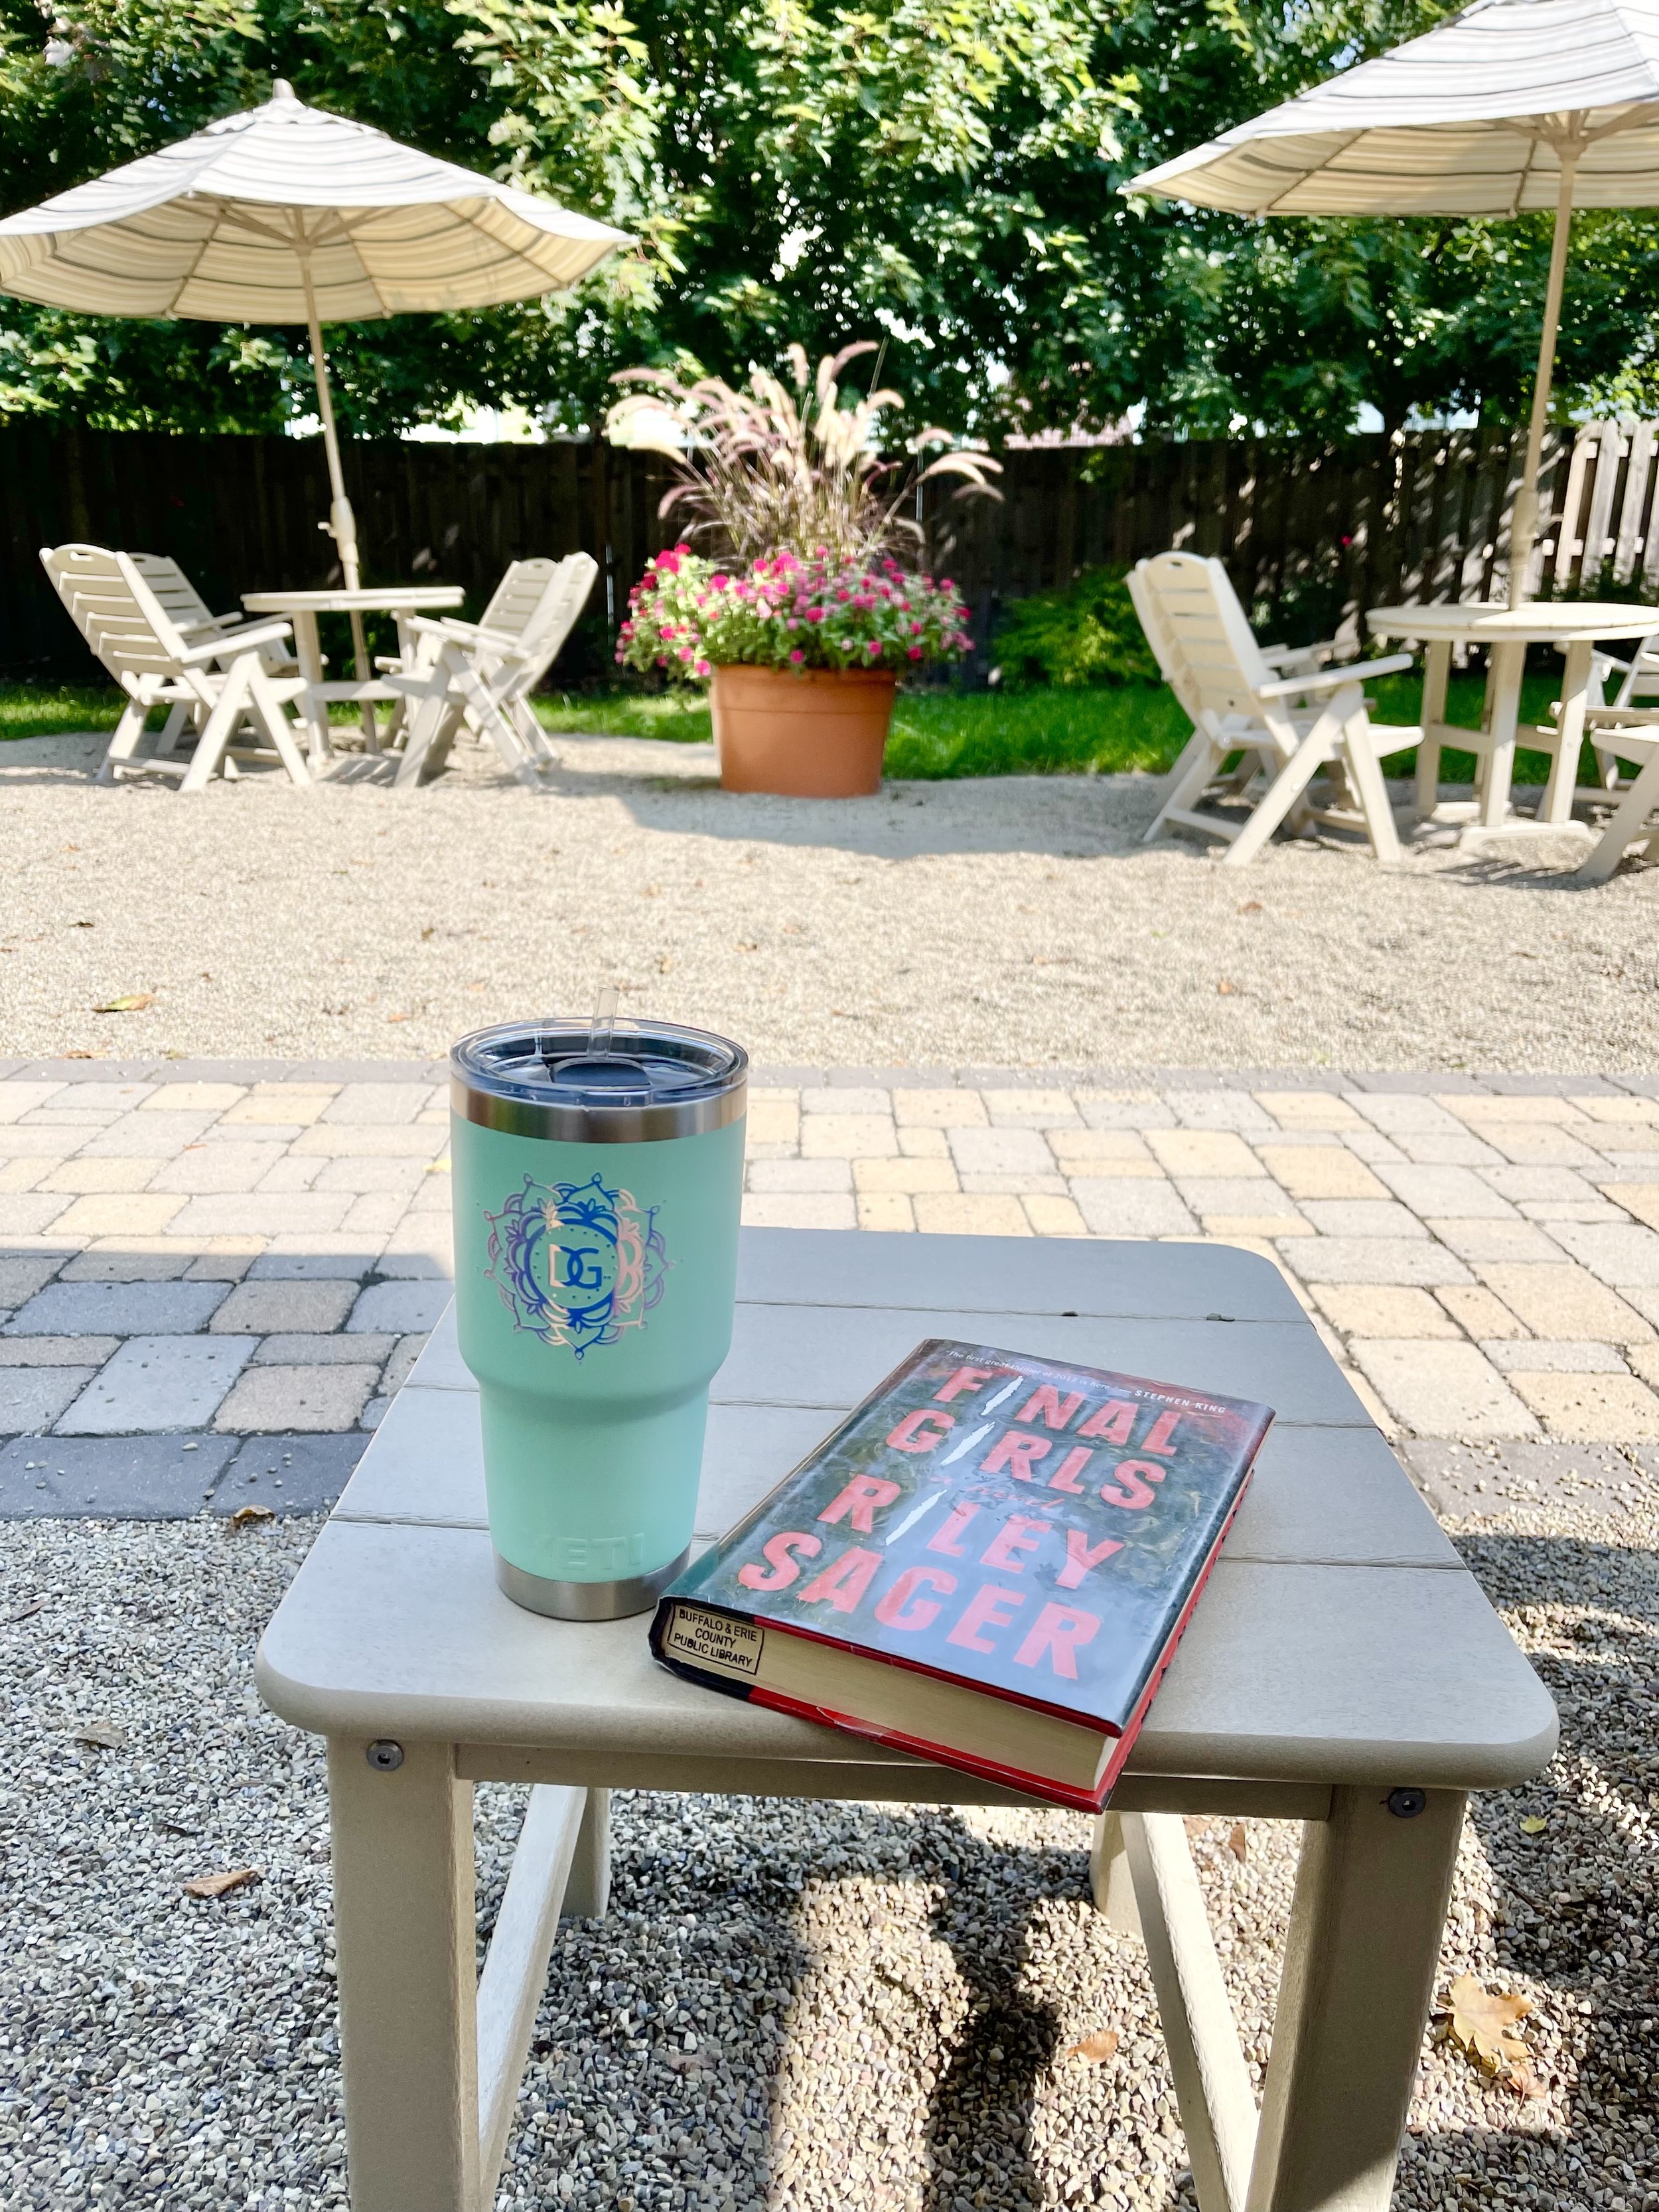
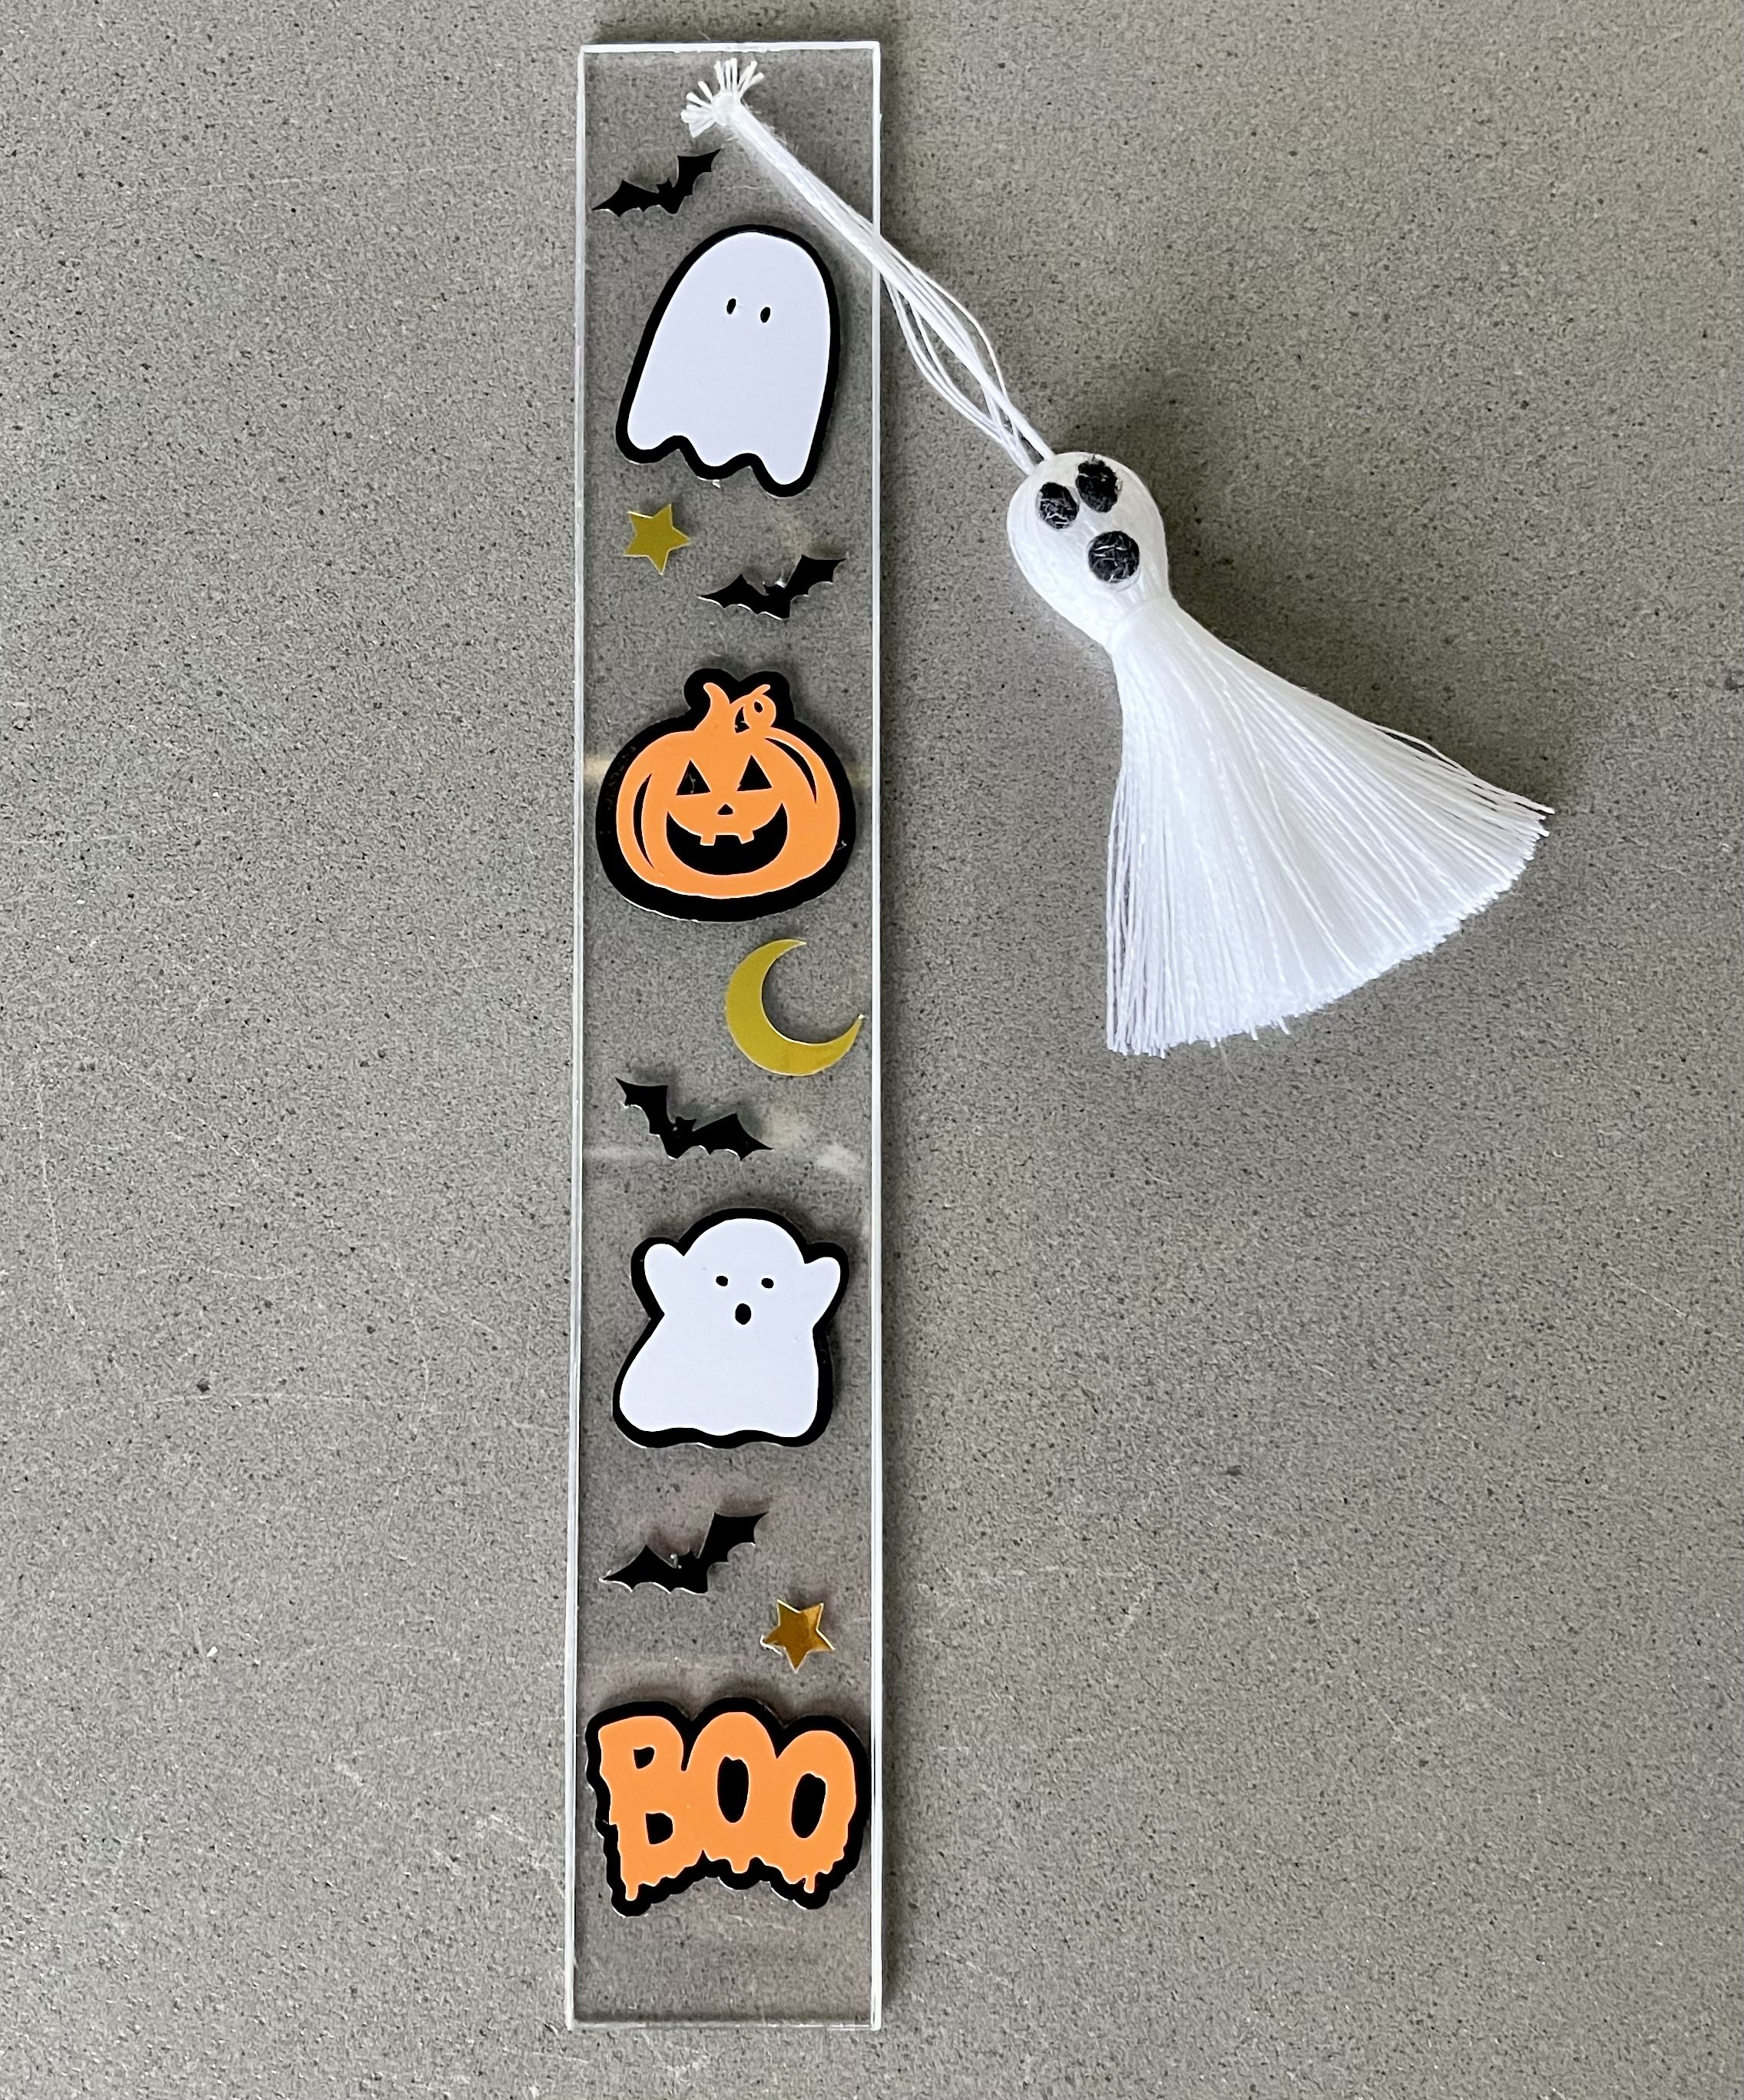
The garden is closed for the season now but my pile of books keeps growing! Since I was no longer reading digital copies on my iPad, I was using my receipts from the library as temporary bookmarks and decided I needed to make something better! I came up with this cute acrylic bookmark and am excited to share this DIY with you!
In addition to the tutorial below, you can also watch a step-by-step video of this process over on my Instagram page!
The first thing you’ll need for this is an acrylic blank. I made my own because I already had some sheets of acrylic from another project and I will show you how to do it if you’d like to give it a try. If not, there are dozens of options on Amazon for pre-made versions of these, just search “Acrylic Bookmark Blanks”.
To make my own, I measured out the width of my bookmark and scored both sides of my acrylic sheet a few times with a carpenter knife then snapped the piece off. I used a ruler with cork on the back which was helpful in keeping my lines straight and the cork prevented if from slipping while using the knife.
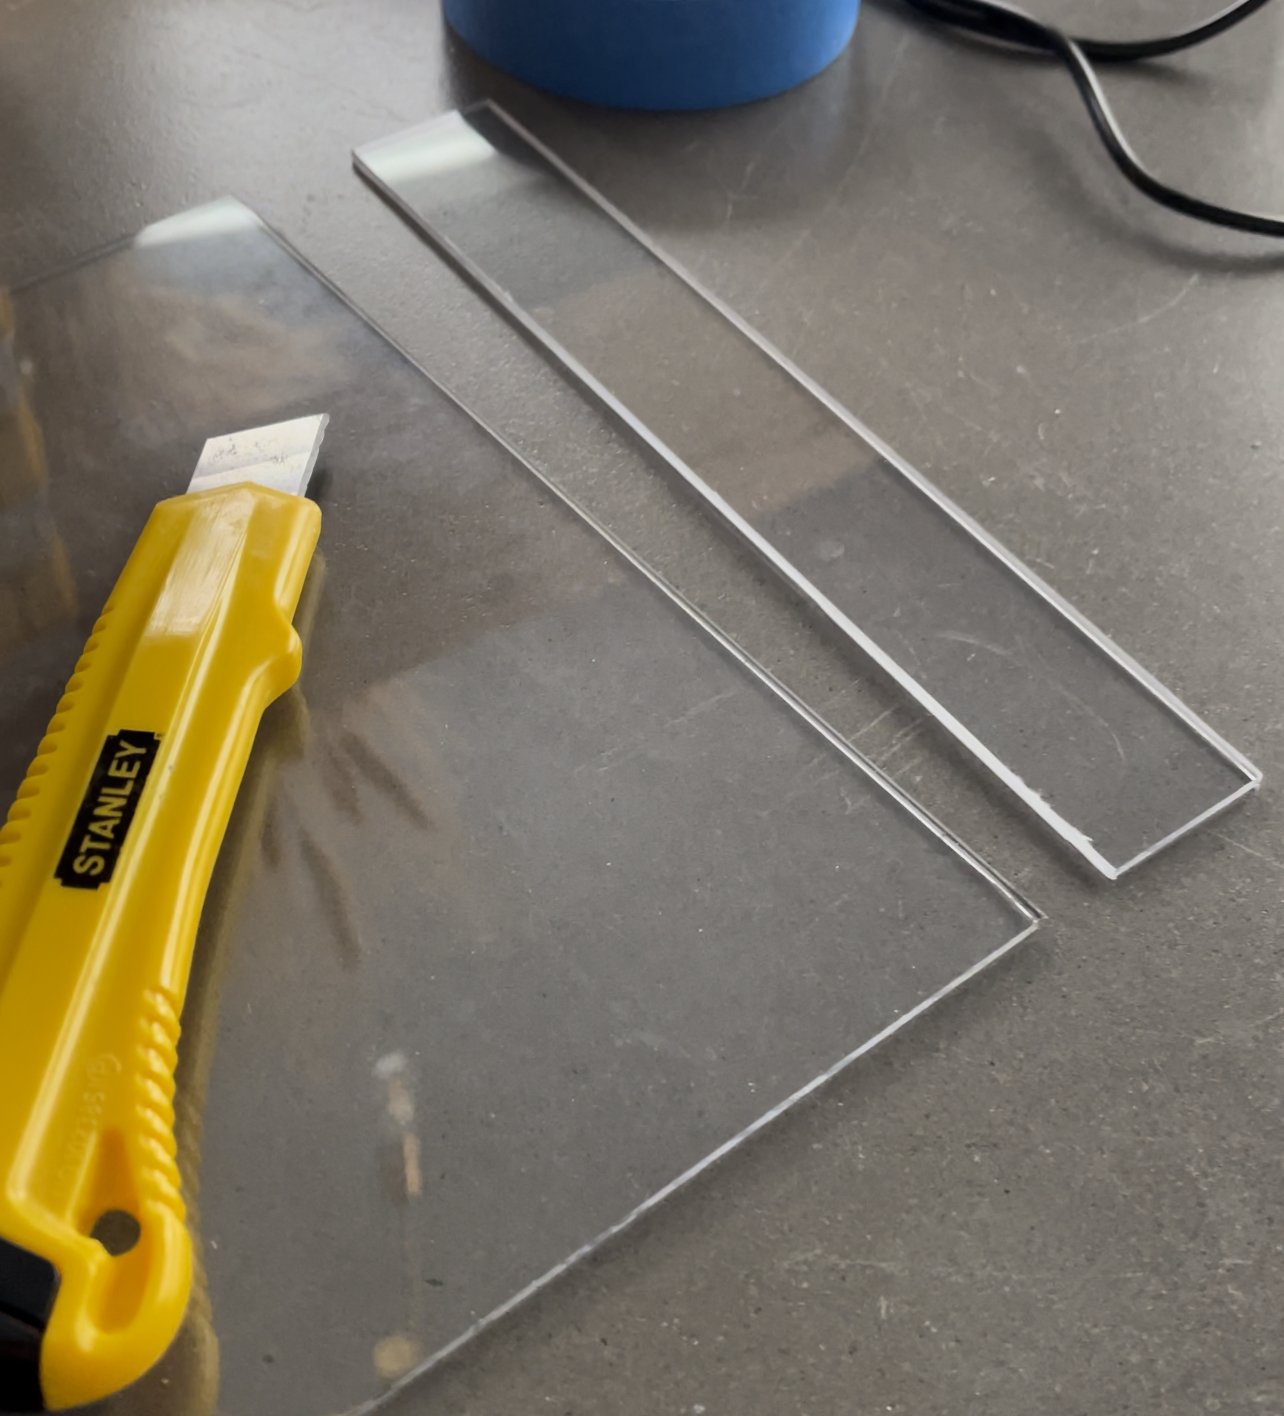
Next, I drilled a hole for my tassel. If you’re using a pre-made blank you can skip this step. I started by putting a piece of painter’s tape at the top of my piece of acrylic and marked my spot with a sharpie. I then taped that to a scrap piece of wood so that I could drill through it without going into my table. I used a 3/32” bit, slow speed and pressure with my drill and drilled through to the wood. Then I put the drill in reverse and carefully backed it out. The painter’s tape, slow speed and pressure are important in preventing your acrylic from cracking during this step.

Next I used Cricut Design space to design the decals for my bookmark. I added a rectangle the same size as the blank to use as a template then added my ghosts, bats, stars, moon, jacko-lantern and text. You can use any clip art here you want, mine came from a mix of free elements from Cricut and the free version of Canva, I used an offset on the four larger images to give them some more detail.

Once I had everything where I wanted it, I deleted the rectangle I was using as my template, welded the black shapes together, cut and weeded my different colors of vinyl.

Next, I used my transfer tape to lay down the black layer as my base then the others on top. I use the tape from this lint roller and it’s better than any transfer tape I have ever tried before.

To make the ghost tassel, I wrapped one skein of white embroidery floss around 4 of my fingers. I slipped that off my hand and threaded a short piece of floss through the top and tied it in a knot. Next, I cut the bottom of the loop open. The floss can be creased and not lat flat depending on how you store it. To fix this, I wet the strings and used a wire brush to separate the strands of the embroidery floss. Next I tied a second string close to the top to create the ghosts “head”. After that I trimmed the bottom so that it was straight across the bottom.
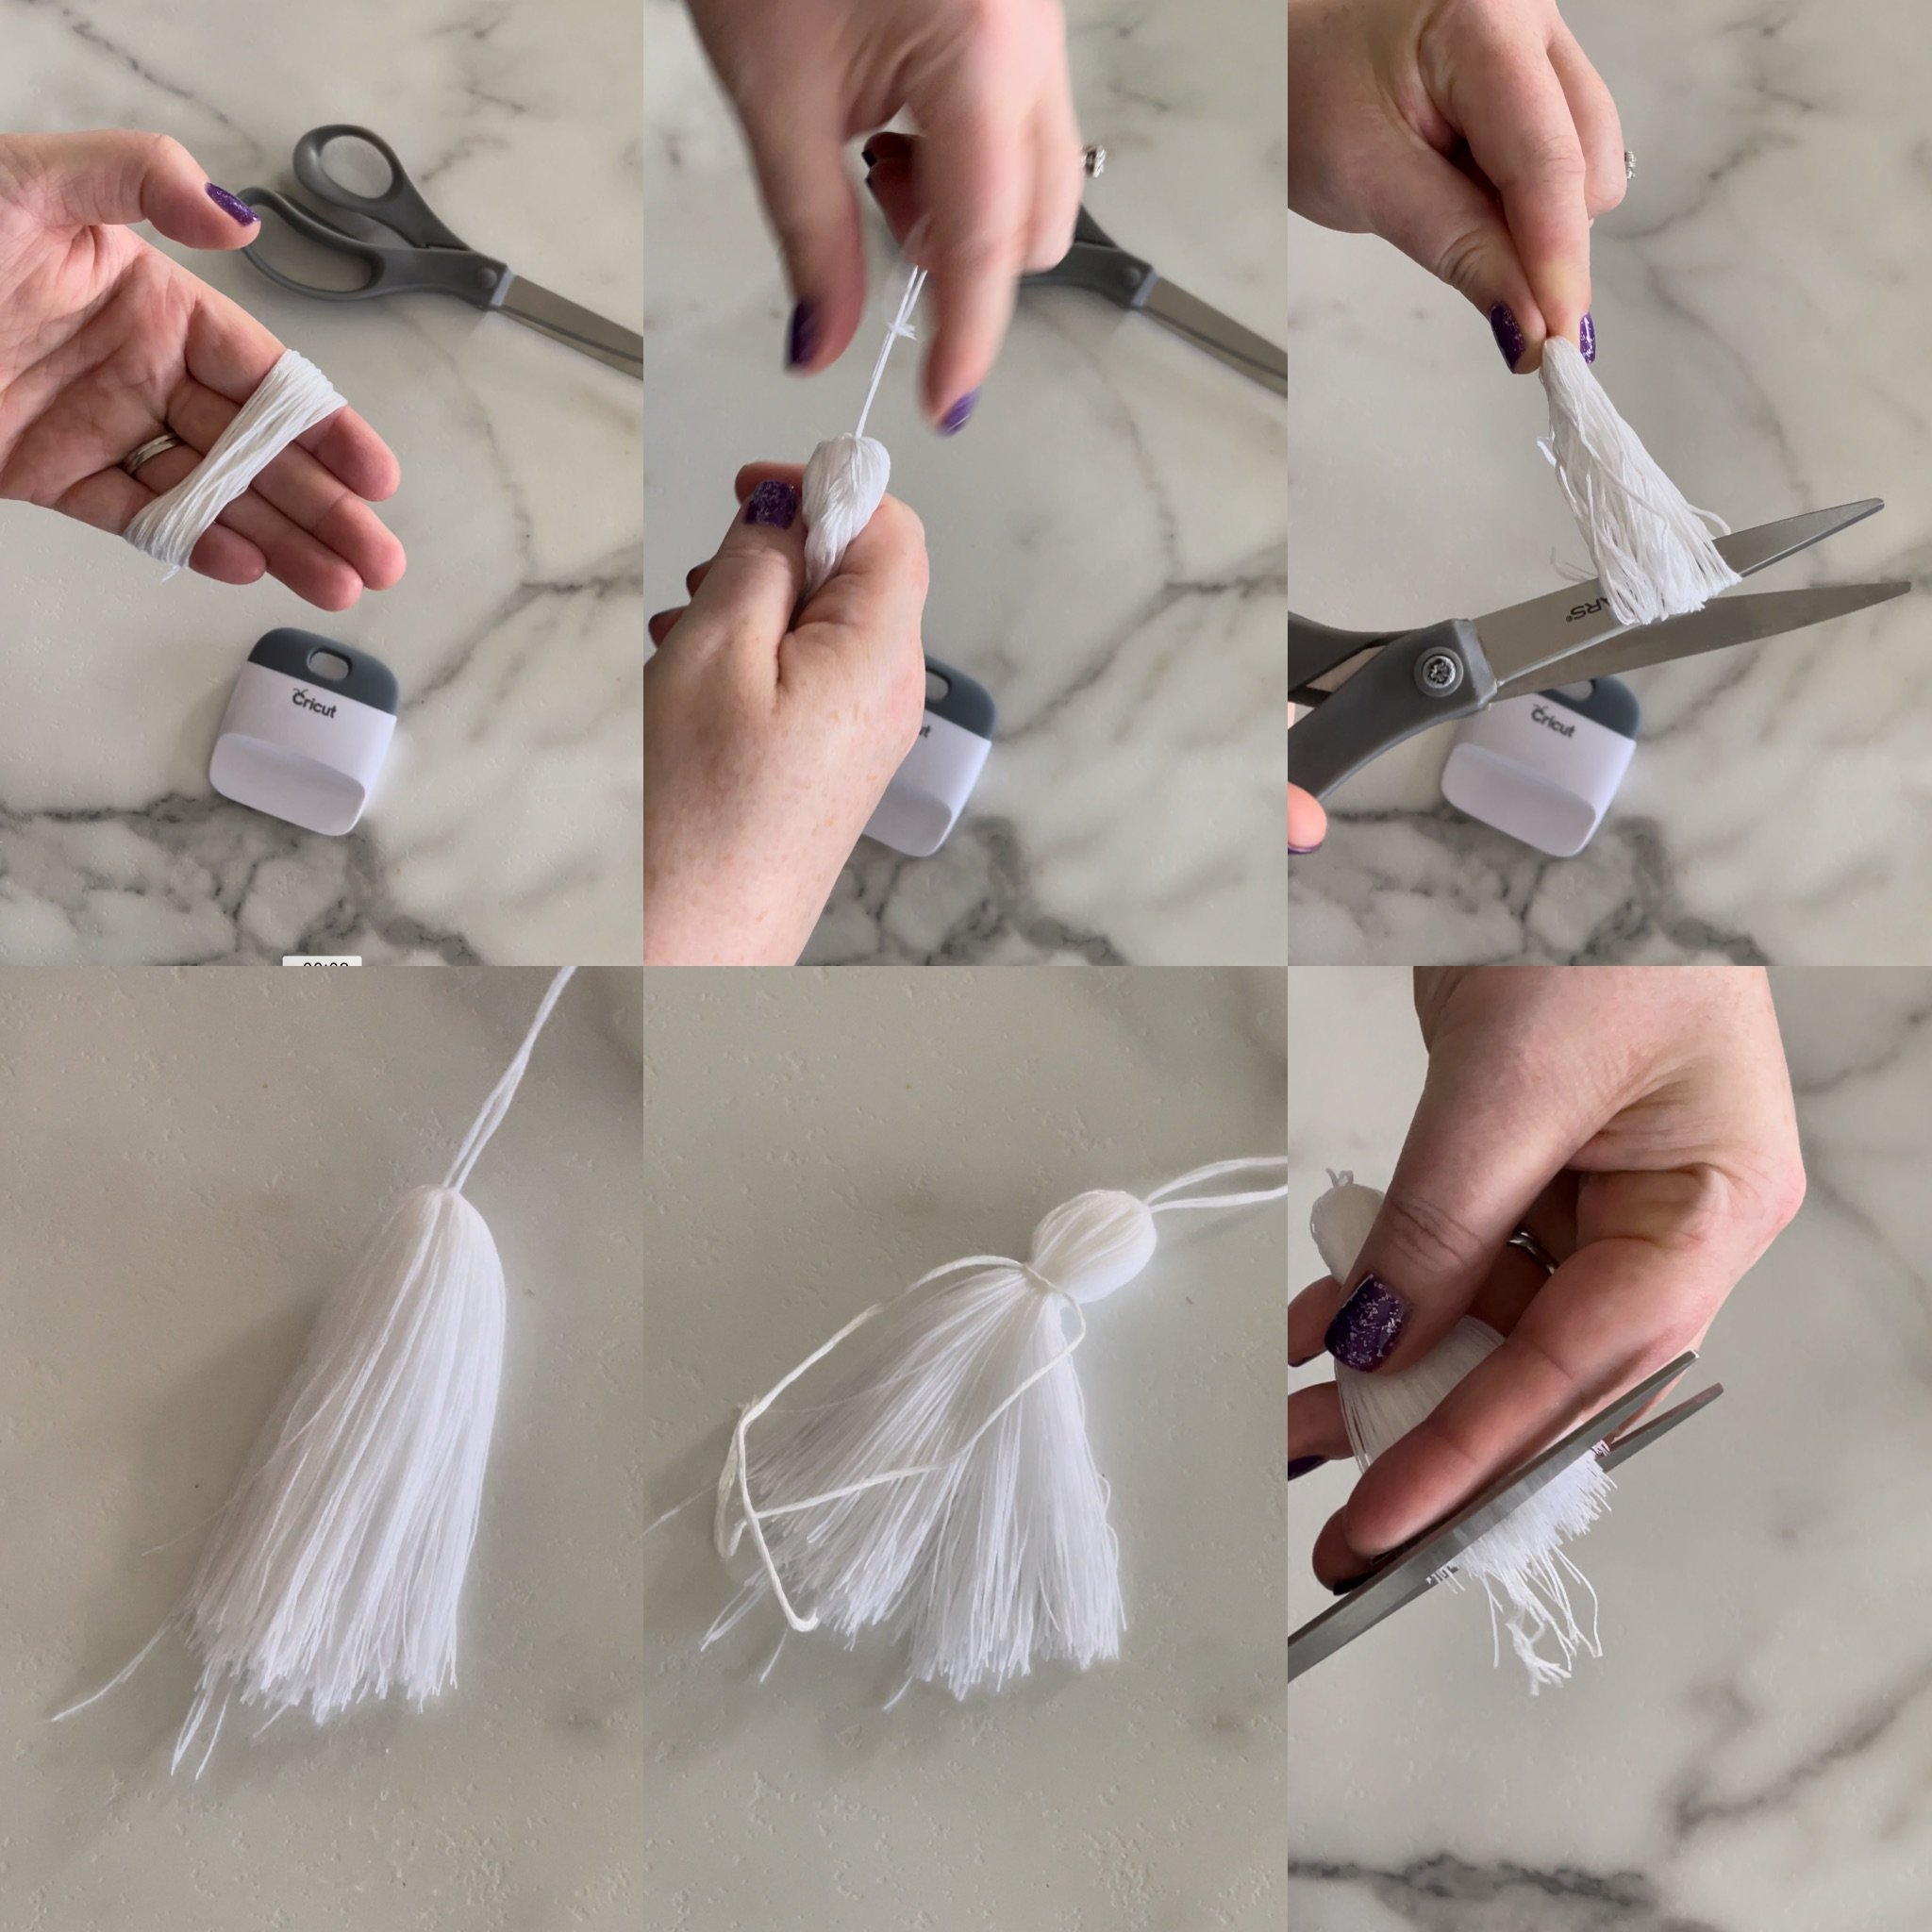
Lastly, I used hot glue to attach tiny pom poms to create the eyes and mouth. I tied the top strings of the ghost to the bookmark through the hole to attach the tassel.
