
DIY PANELED ACCENT WALL

When we purchased our home, one of the first things I fell in love with was the dining room. Its main wall is the first thing you see when facing the kitchen and the ceiling height makes the room feel massive. It’s filled with bright natural light from two windows and a sliding glass door and the views are beautiful.
Despite the bright green paint and linoleum floors when we bought it, I could see major potential for this space.

When we moved in, we put in new flooring throughout the house and painted all the walls a light gray. The picture below is how the wall sat until last year. I tried different artwork and ideas but could never find something that worked with the large scale of the wall.

My inspiration came from the Savoy office in Netflix’s Emily in Paris. The way the different moldings were made into panels on the walls then painted the all the same color was so subtle yet detailed and beautiful.

My original plan was to go to Lowes to check out different moulding to see what I liked best first and then to map out the design. I got too excited in the store, picked out the molding and ended up guessing how many pieces I would need. By the time I realized that amount wasn’t enough, we had to go 2 locations out from our local one to find more. Long story short, you should definitely plan first and shop second so you know you have enough before you start!
Below is a list of all the tools and supplies I used for the project and links (when possible) to them.

Yardstick Carpenter Pencil Tape Measurer Hand Saw with Miter Box Air Compressor Rubber Air Hose Brad Nails Craftsman 2” Brad Nailer Model: 6G28/F50 Simple Moulding Ornamental Moulding Painter’s Tape Laser Level Caulk Wood Filler Sand Paper Angled Trim Paint Brush Interior Wall Paint (Color: Sherwin William’s Peppercorn) Standard Paint Roller Frame Standard Paint Roller Trim Roller Frame Trim Roller Outlet Cover
If you’re intimidated by my mention of the air compressor and rubber hose for my brad nailer, don’t be. They make cordless ones now that only need a rechargeable battery just like a power drill. I have the old school set up but if you’re looking to purchase something now, I would definitely suggest the “new age” version.
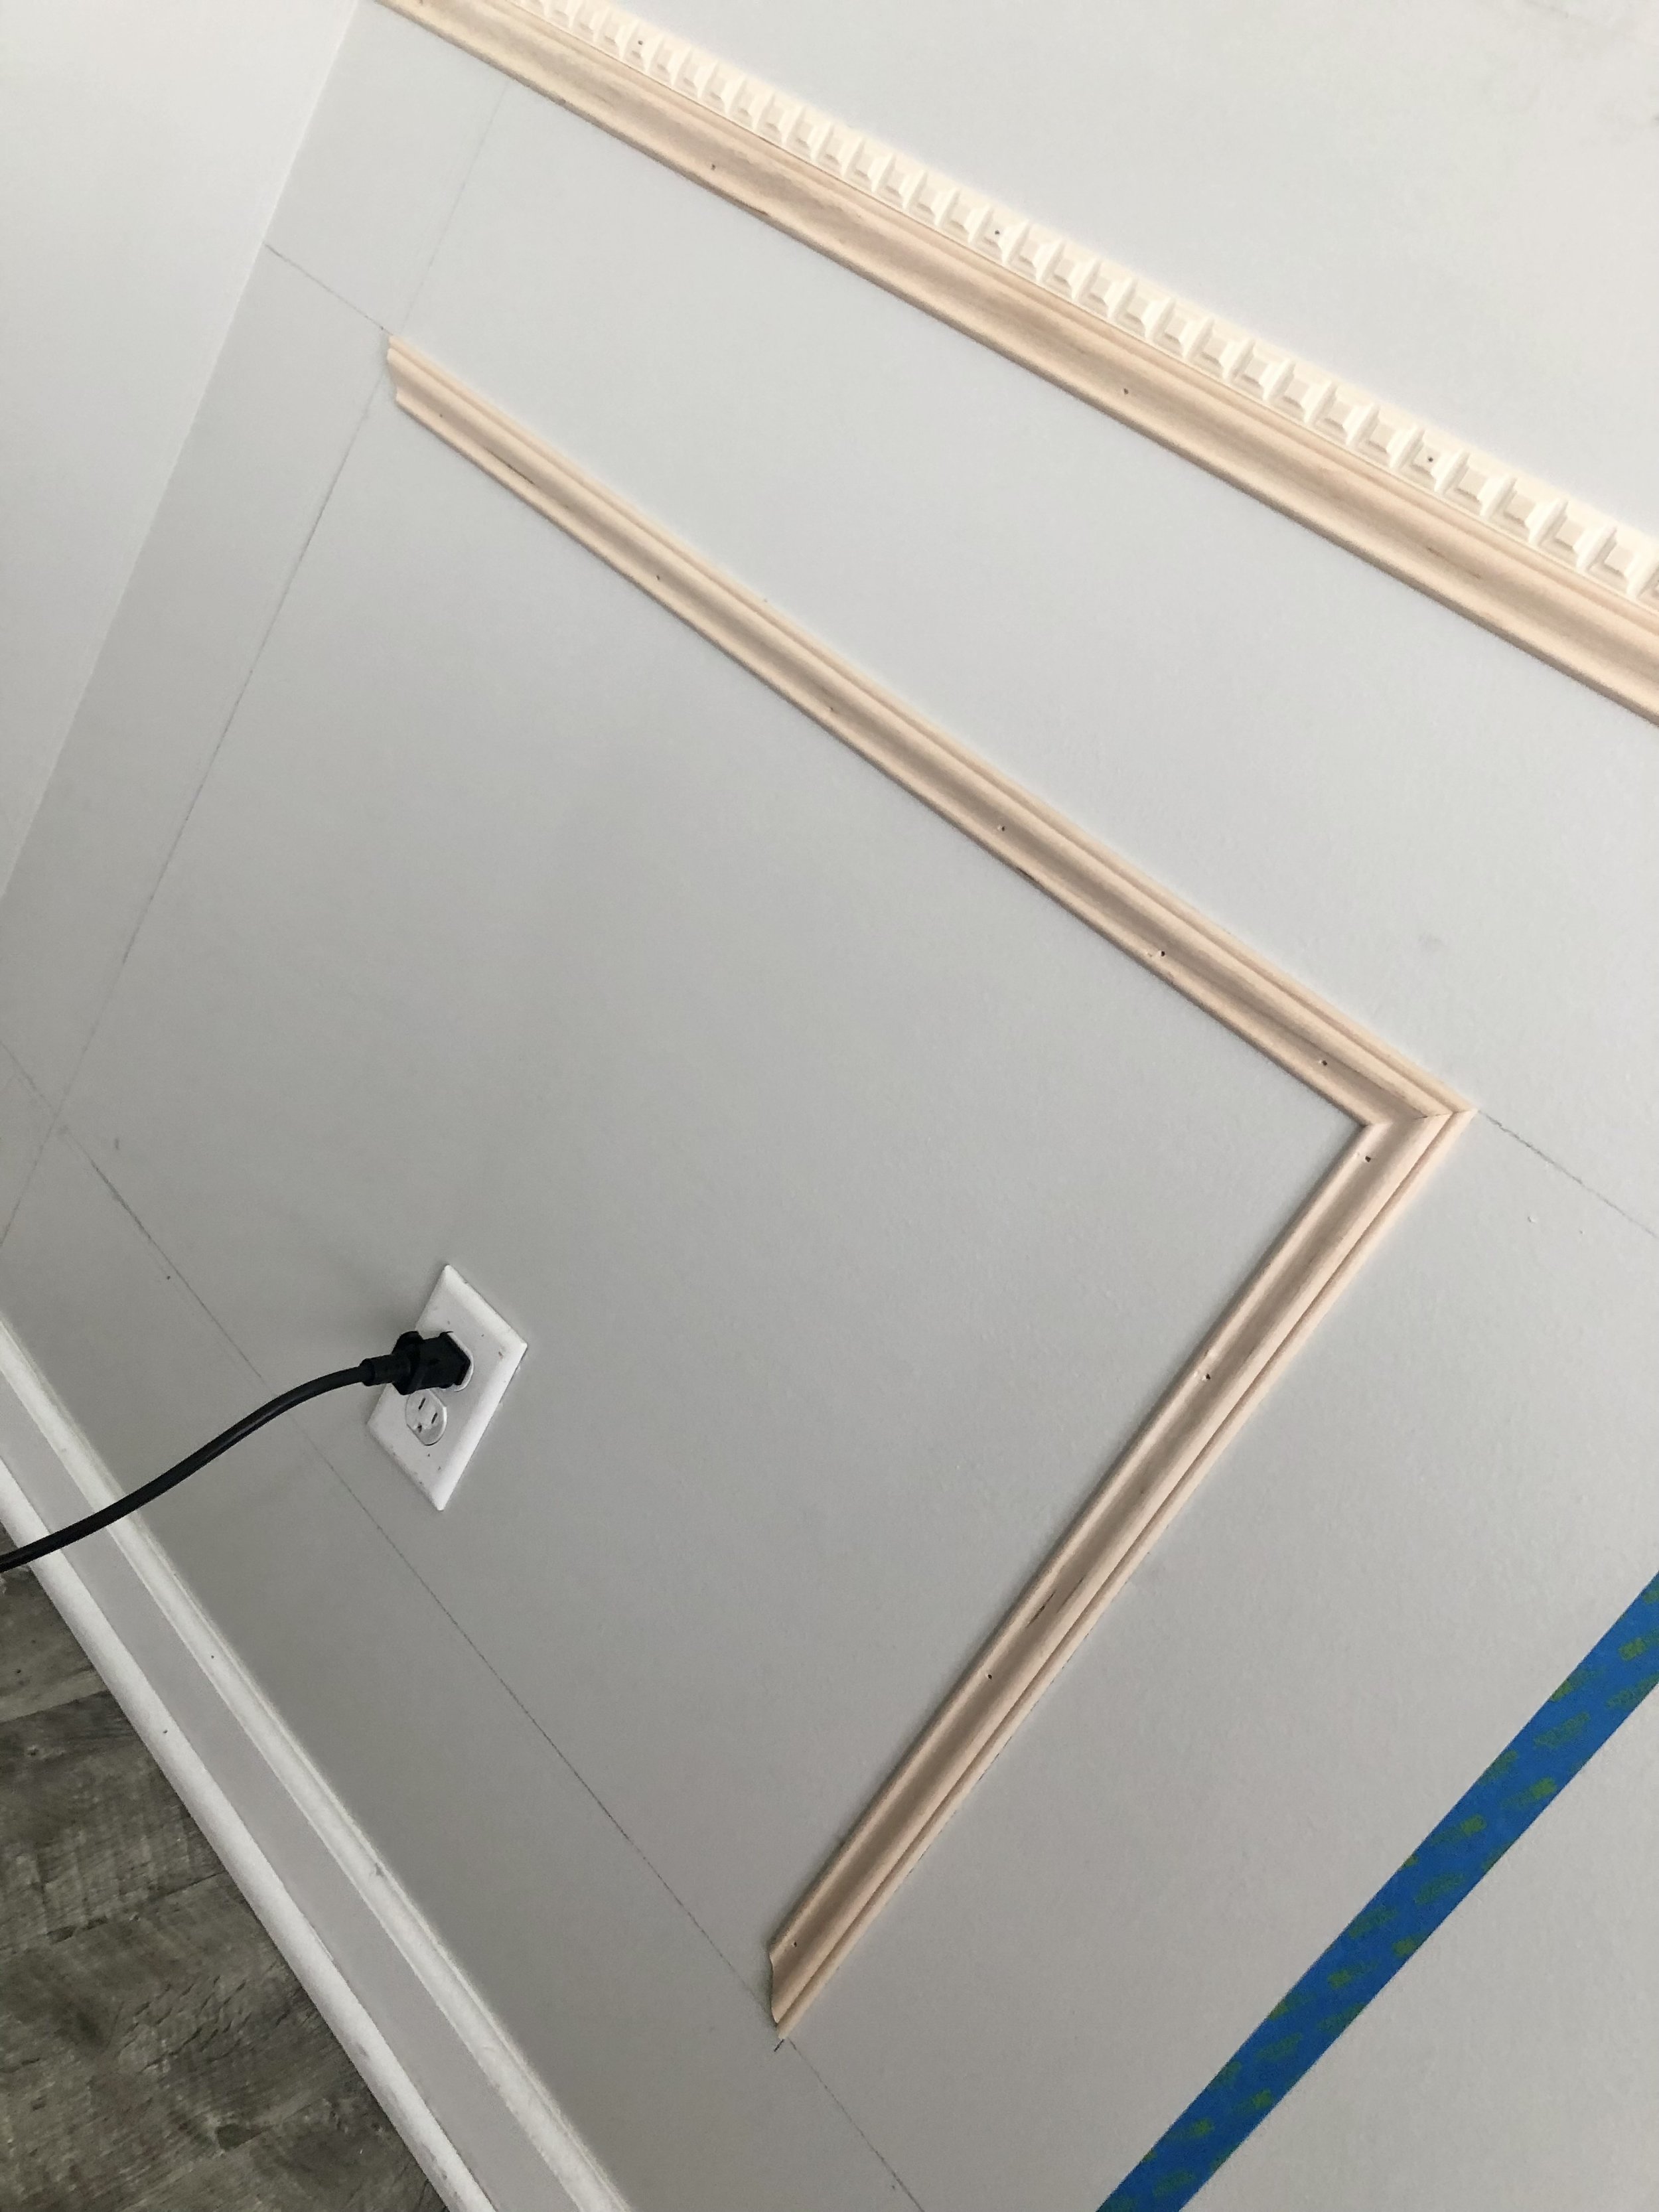
To start, I used the yardstick to measure and draw a pencil line at the standard chair rail height across the wall. I used a tape measurer to determine the length of the moulding needed and used my hand saw to make the straight cuts.
I used my brad nailer to attach the simple moulding underneath the line first then the ornamental moulding on top of that.

Next, I roughly mapped out some panels using painter’s tape. I had a piece of artwork that was going to be hung in the center, so I worked the middle panels around that. The great thing about the tape is you can play around with different sizes and spacing until you find something you like before committing.

Once I had the panels mapped out, I marked them in pencil using the laser level and yardstick. I used the simple moulding and made miter cuts using the hand saw and box. I put the brad nails in the dip in the moulding knowing it would be easier to disguise the holes with the wood filler later on.

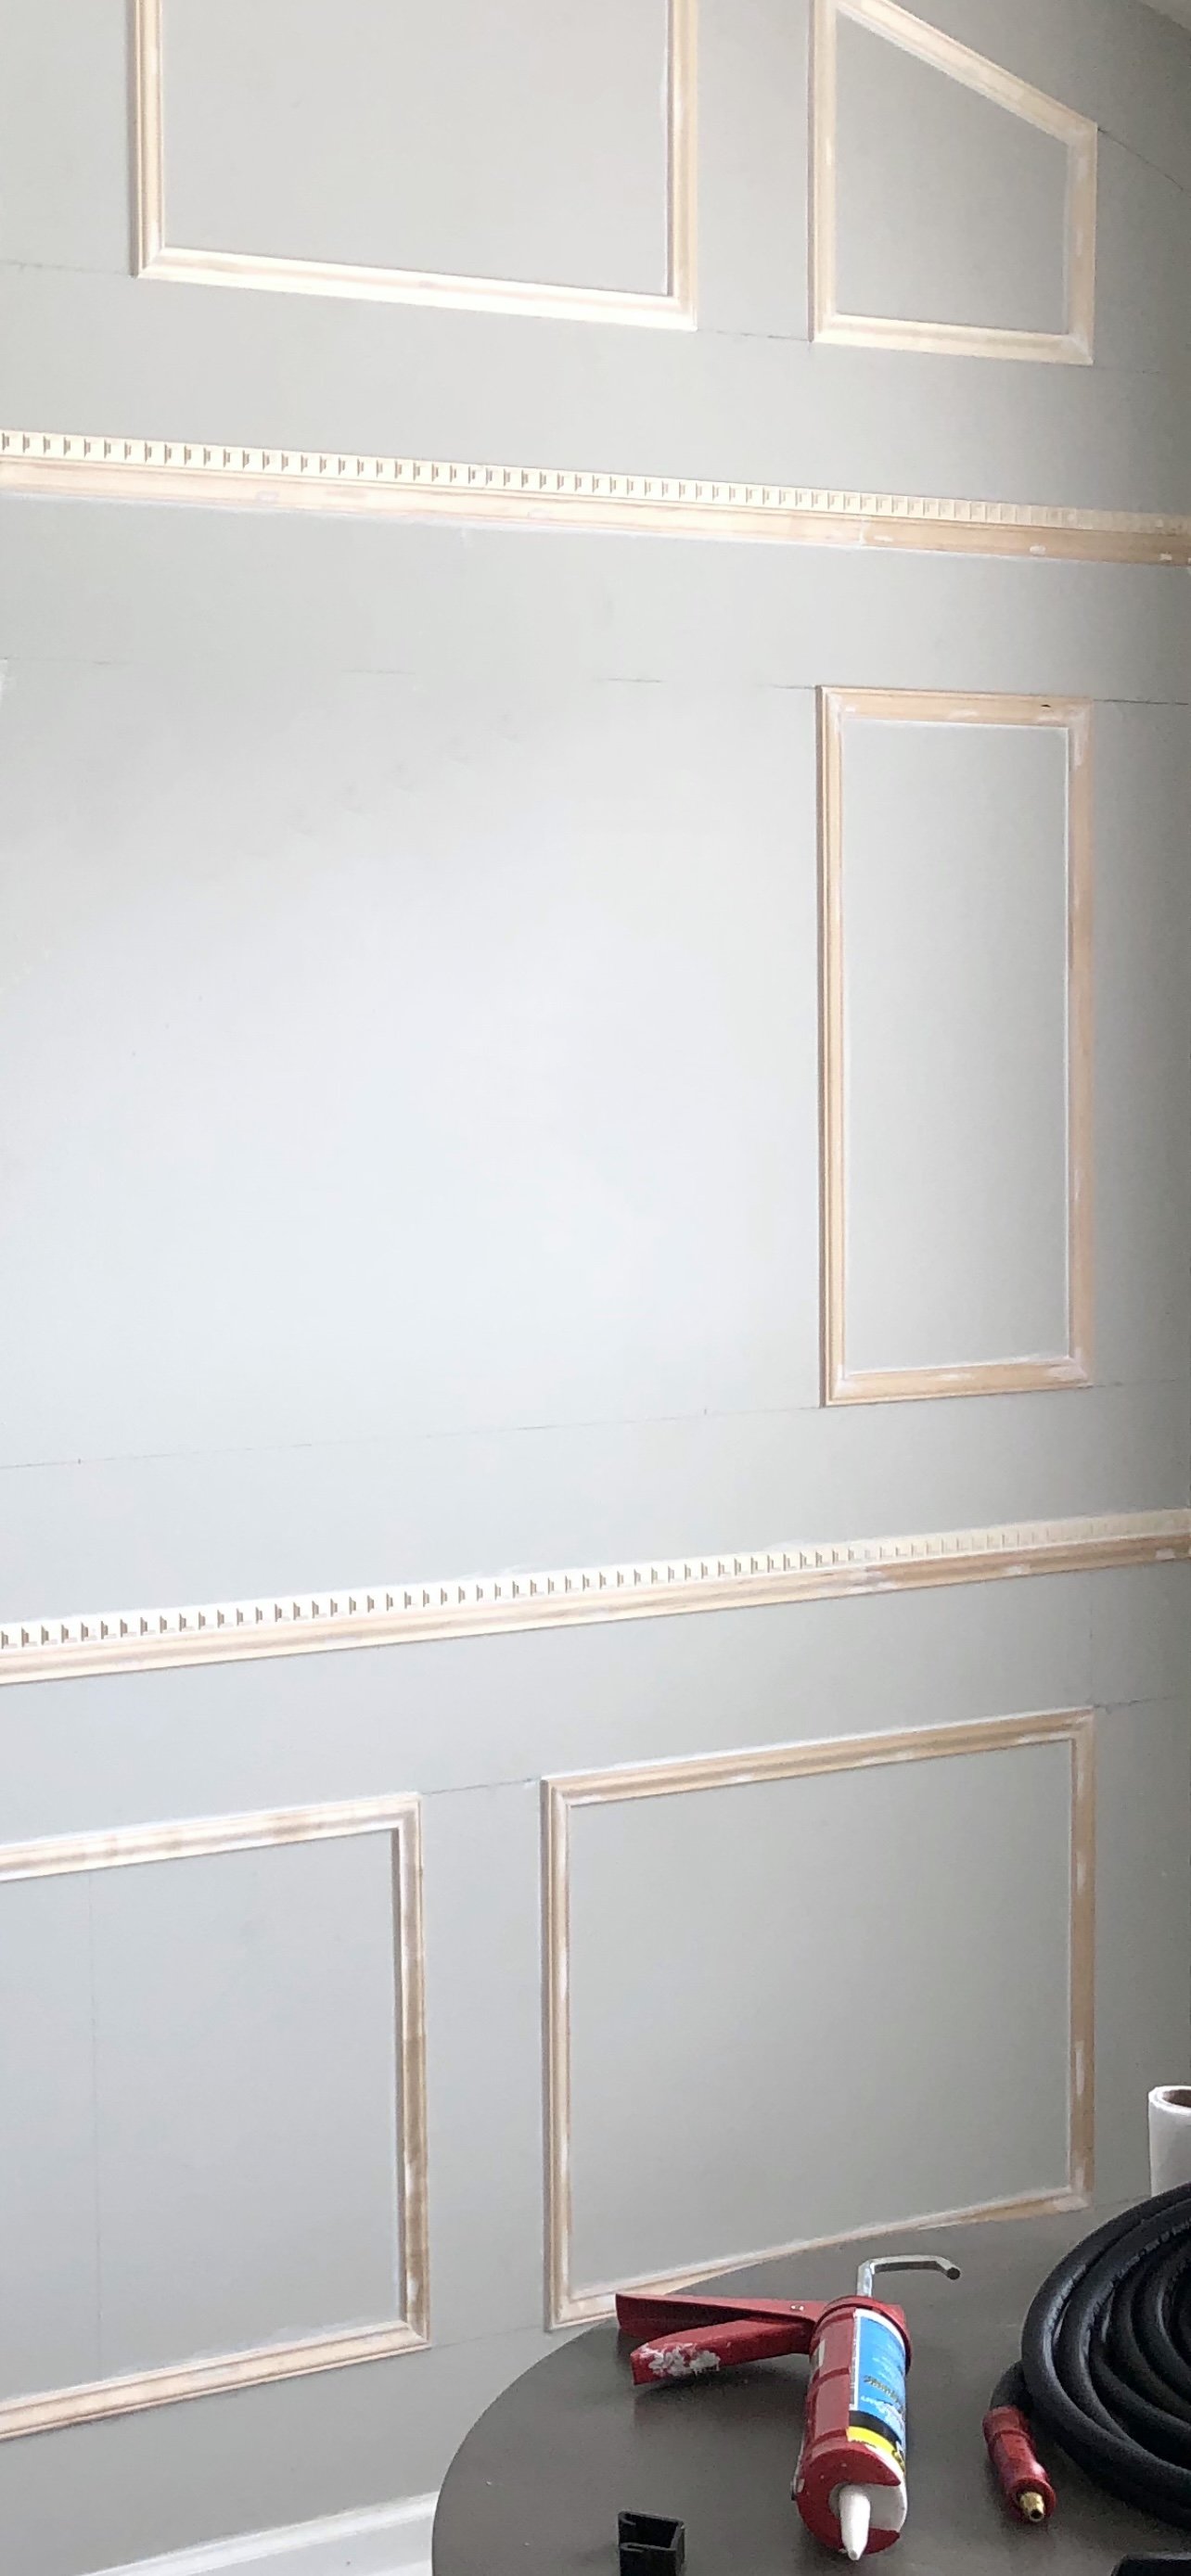
Next, I added another horizontal line using both types of moulding above the middle panels.

I added 4 panels to the top of the wall. Since the ceiling is angled, I had to free hand cut some of the pieces (the box that comes with the hand saw only allows you to cut 45 and 90 degree angle cuts).

Once all the panels were installed, I used caulk to fill in any noticeable gaps between the wall and the moulding and used wood filler to fill in the brad nail holes. Once the filler dried, I used a light grit sand paper to smooth everything out. This step is key to making sure everything will look completely seamless once painted.
Before painting, I went over everything with a microfiber cloth to make sure all the dust was removed. I used a paint brush to paint the moulding and the areas around it that wouldn’t be accessible with a roller.

I then used a regular roller to fill in the bigger spaces and a trim roller for the tighter spaces.

I repeated the same steps for a second coat of paint.

I had only planned on painting this accent wall the darker color but once it was done, I loved the color so much I wanted to paint the other walls. I pictured a moody, dark feel to the room and decided to go all out and paint the whole room including the ceiling.

I hung the artwork using command strips and installed the paintable wall plate to cover the white outlet.

Now for my favorite part of a project, the side-by-side before and after! Here’s where you can see just how wild of a transformation this wall alone gives the room.
